Candle-Making
A fun activity that yields beautiful candles
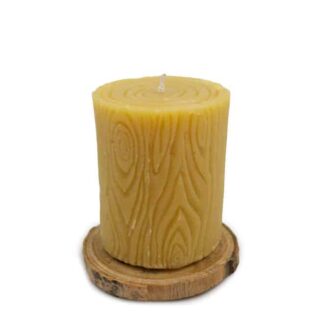
How to make beeswax candles
Beeswax is an all natural, renewable resource that is the least processed and purest of all candle waxes. Each candle burns soot-free and without drips for approximately 20 hours giving off a warm and cozy glow and an earthy, natural scent. Making beeswax candles also supports beekeepers who in turn support the very bees that are critical to food production around the world.
Please note: Candle-making is an adult activity/craft. Adult supervision is required if making candles with children.
What You'll Need
- One-quart saucepan
- Sack of beeswax
- Empty 45 fluid ounce can for melting wax
- Stabilizing sticks to hold wicking in place
- Beeswax wick
- Large-eye darning needle
- Wood grain candle-flex mold
- Rubber bands
- Freezer paper
- Plyers to pull needle and wick through the mold
- Sharp-nosed scissors to trim wick
- Wood coaster and squares of felt to pad the coaster
- White glue
Step 1: Wick The Mold
Flatten one end of the wick by squeezing it with a set of plyers. Thread the darning needle with the flattened end of the wick and pull approximately 1” of wick through the eye of the needle. Use the plyers to pull the needle through the bottom of the mold, leaving 1” out the bottom of the mold and at least 6 inches above the mold.
Place three rubber bands around the mold and carefully align the cut sides. Place the wicked mold on a level surface protected by freezer paper. Straighten the wick and center it in the mold, holding it in place with the two stabilizing sticks. Be sure the wick is centered and don’t pull it too tight or you will have problems burning the candle later on.
Step 2: Melt the Beeswax
Place pre-measured wax into a clean 45 oz. can or any metal container that you will dedicate to the beeswax melting process. If using a can, squeeze one edge slightly to make a pouring spout.
Half fill a one-quart saucepan with water and place the can and wax inside. Heat the water to a slow simmer. Stay close by during the melting process. Beeswax melts at a low temperature – 150-160 degrees F.
Step 3: Carefully pour the melted wax into the mold
Step 4: Unmold the Candle
When the beeswax hardens completely — approximately four hours — gently separate the mold at the seam and pull the candle out of the mold. The bottom of the mold is now the top of the candle. Trim the wick remaining at the bottom of the candle with sharp-nosed scissors, digging a bit below the surface of the wax to remove the nub of the wick.
Trim the wick at the top of the candle to about half an inch.
Step 5: Make the pad for the wooden coaster
The coaster is cut from the branch of a tree common in Nebraska, the red cedar.
Place the coaster on the square of felt and trace around it, then cut the felt approximately 1/8” smaller than the tracing. Spread glue on the bottom of the wood coaster and attach the felt.